Team Highlight - Shane

We are thrilled to showcase Shane, who is an architect and woodworker with an eye that clearly sees how objects unite harmoniously. Growing up near Chicago, Shane attended the Illinois Institute of Technology, where he had the opportunity to study abroad in Europe and Japan. There, he was inspired by both the clean lines of modernist architecture, and the details and joints of traditional hand craftsmanship. After a short period working at a high-end residential firm in Chicago, Shane felt the need to get his hands dirty and moved to Maine to study solid wood furniture building at the Center for Furniture Craftsmanship. Following his completion of the program, Shane moved to Seattle to carve a new path in the Pacific Northwest.
Shane is hands-on and enjoys working collaboratively with both clients and contractors. His technical knowledge and construction experience make him an asset for on-site, real-time problem solving. He considers constructability early in the process and understands the importance of outside-the-box thinking, while carefully planning for a design’s real-world execution.
We'll be featuring four furniture projects that Shane has completed through Atelier Drome. He will walk you through his process for each project, along with showcasing the final design. This will include getting a peek at mockups, drafts, and prototypes that will ultimately lead up to a polished end result.
1. Orange Studios
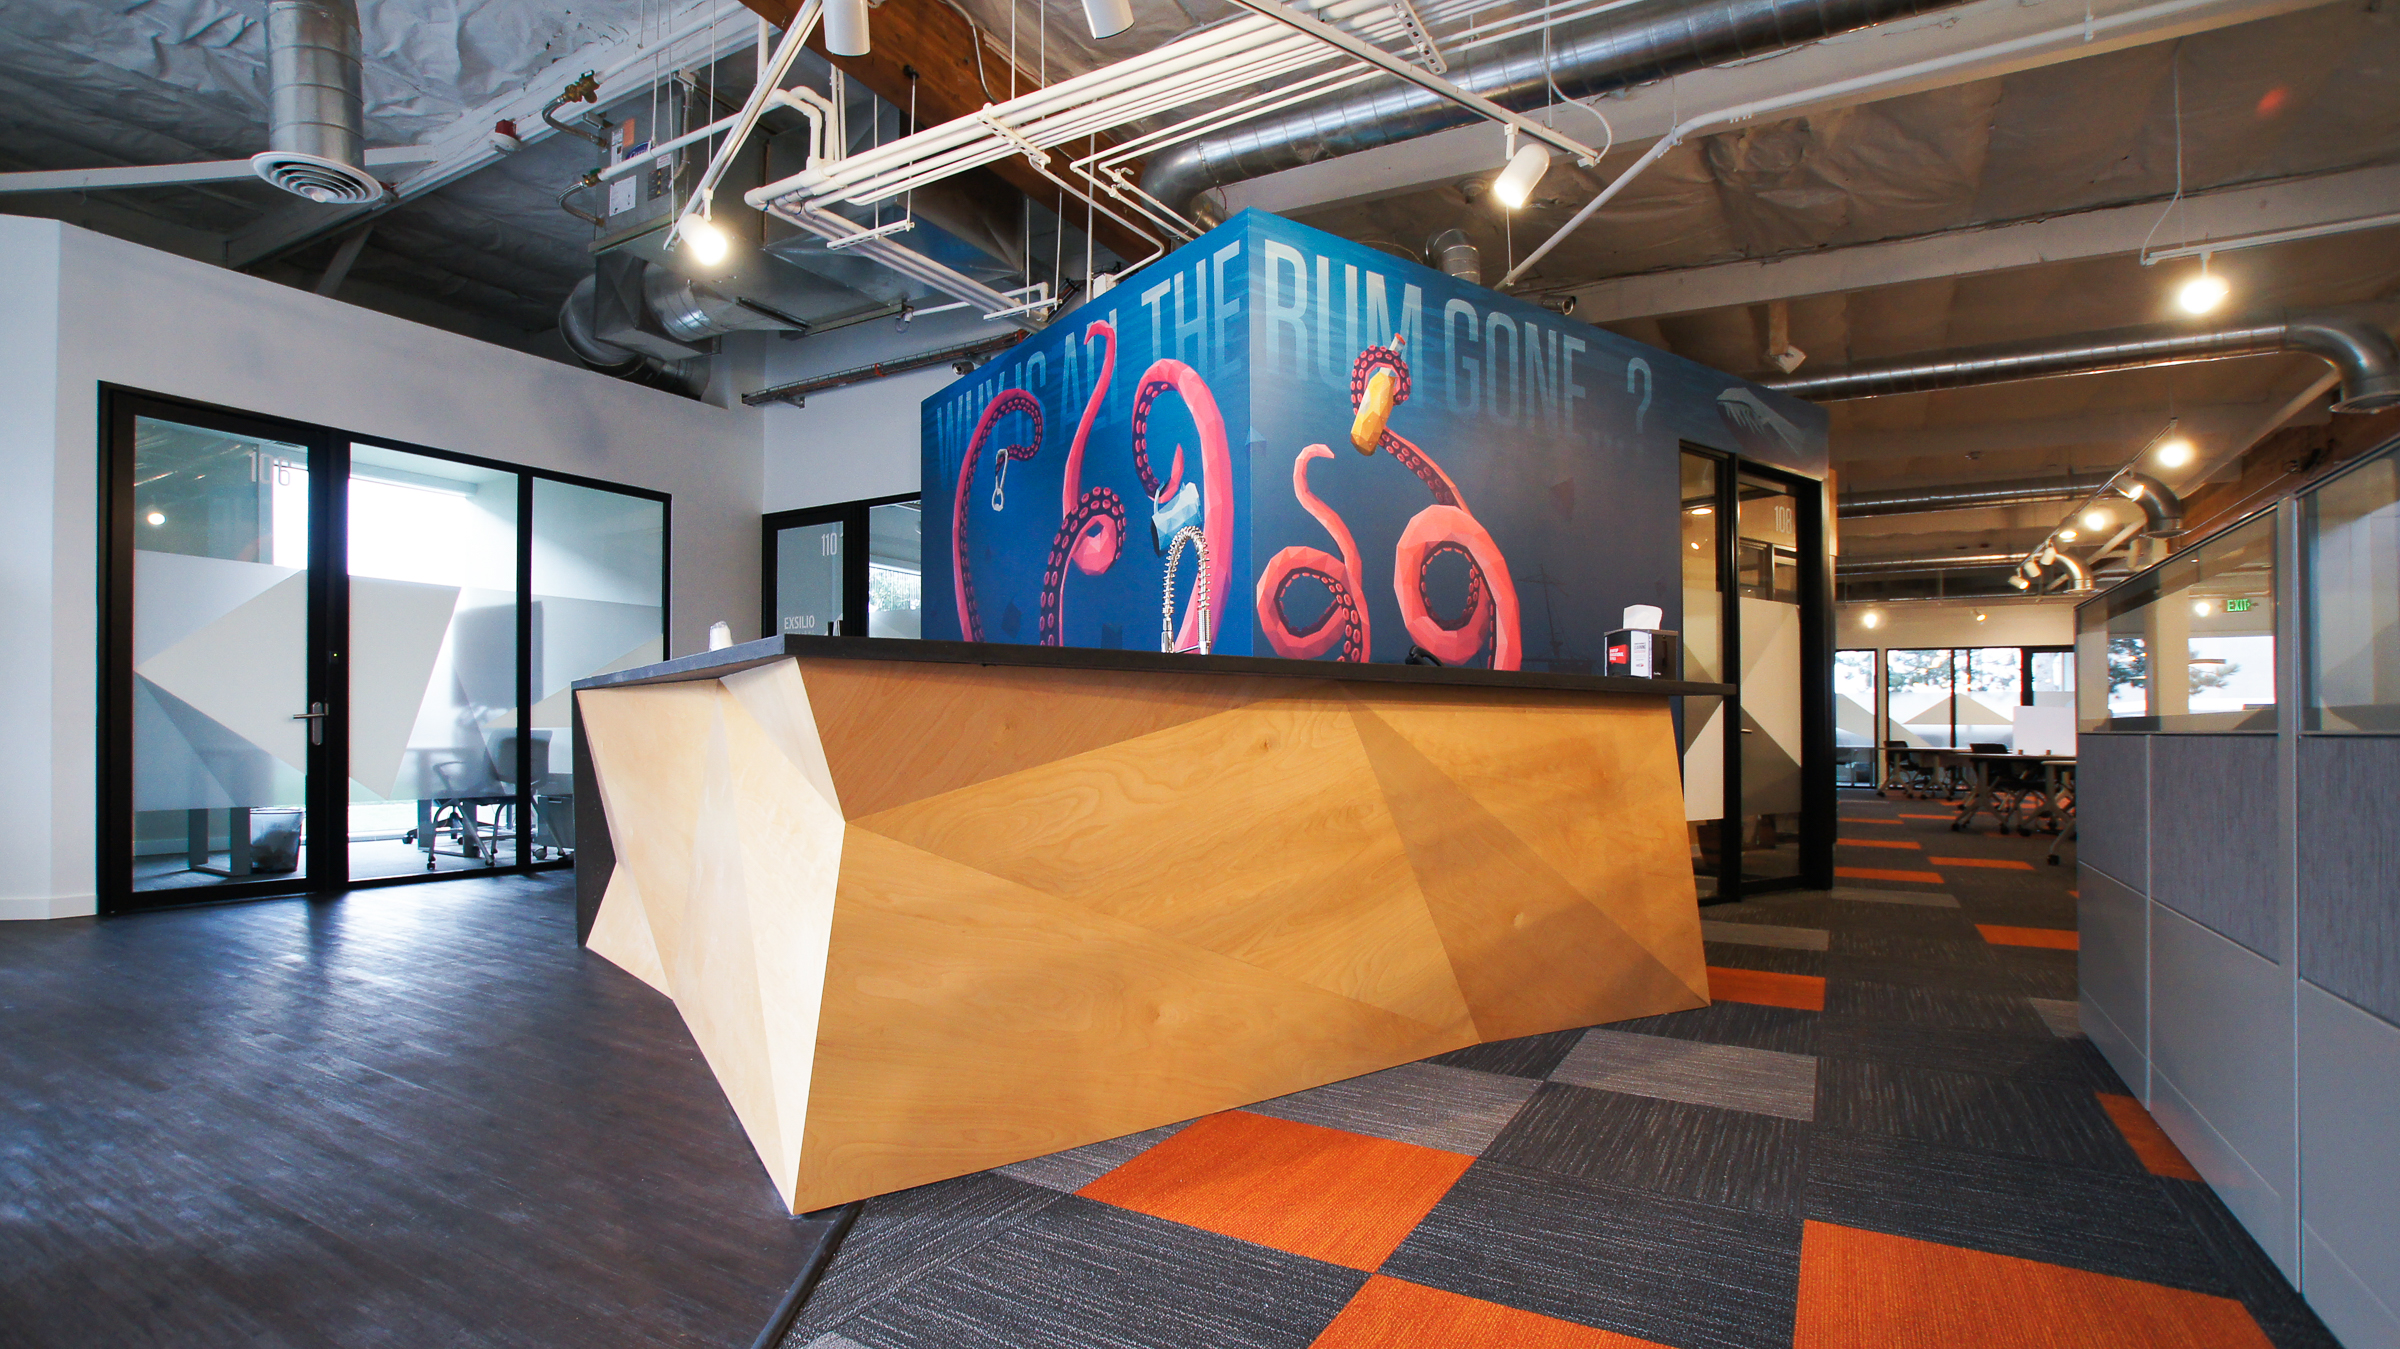
The first time I had the opportunity to use my woodworking on a project at Atelier Drome was for the Orange Studios shared office project. The concept was for a large shared office area where clients could rent desk time, have access to internet, conference rooms, and a professional work environment. The concept called for an eye-catching reception desk and a coffee bar. The design pulled from their graphic design of triangulated polygons, which is found in their logos and many murals that are in the space. Built almost completely with birch plywood, the form is an undulating shape of triangles that push and pull along the length of the reception desk, creating natural stopping points for conversation with the receptionist. Similarly, the coffee bar, with a paper stone top, wraps around three sides.
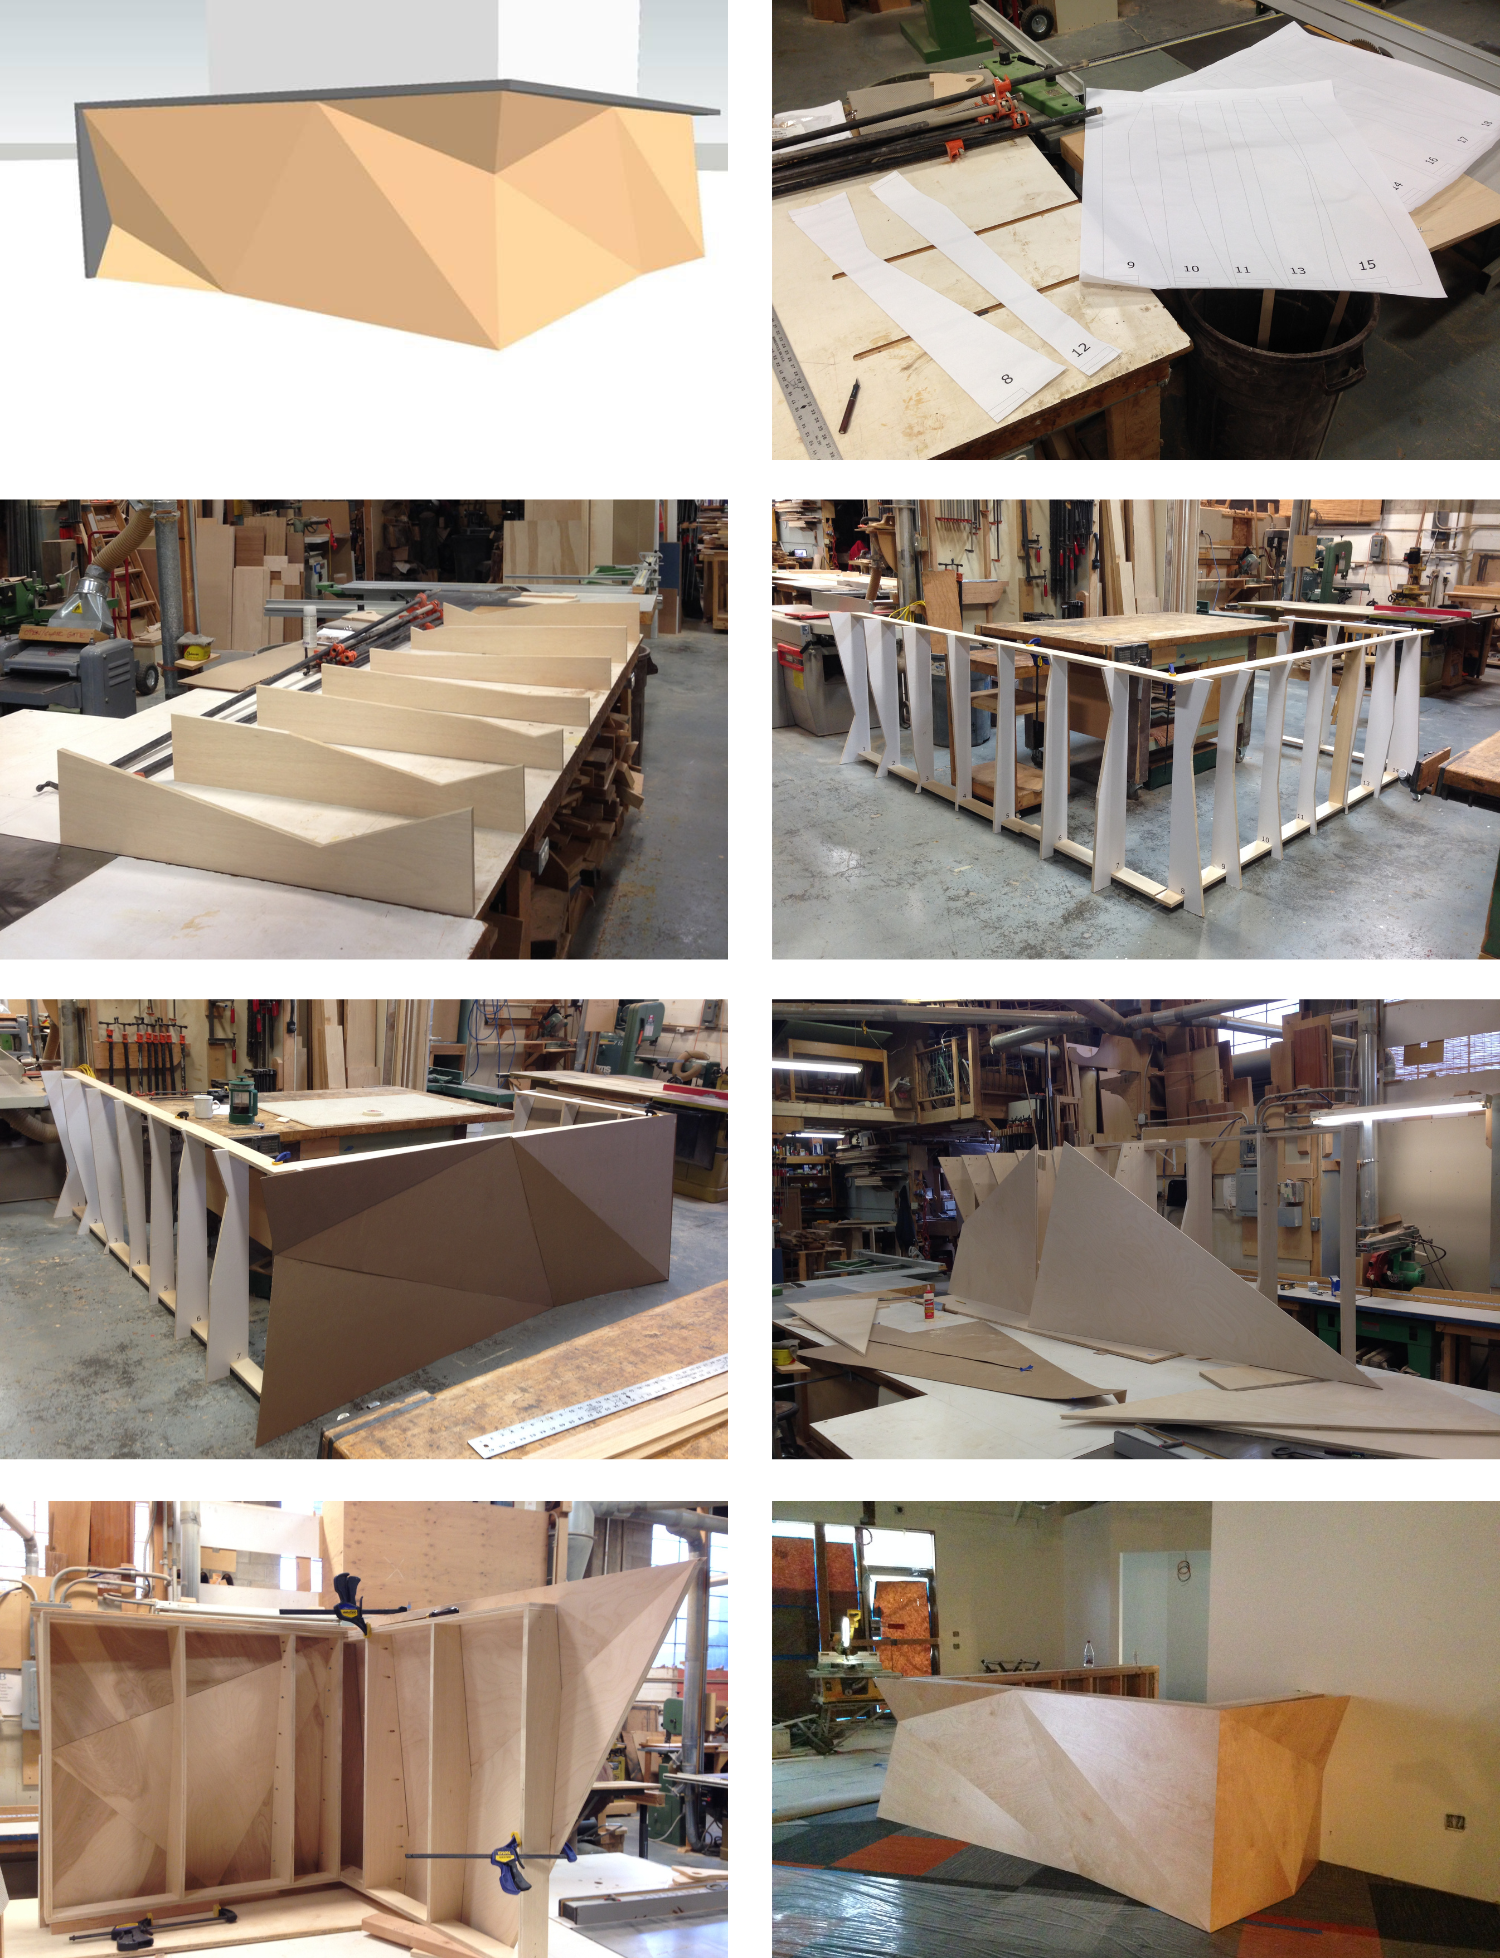
First, renderings were made to begin having a visual concept, which would help to create a frame, with parts being measured directly from the 3D model. Full scale print outs of the slices and cut out plywood ribs based on the templates- the ribs were the primary foundation, and the skin would go over them. From there, cardboard mockups were cut out of the triangular pieces of the skin, which would later be replicated with birch plywood in the final form. The panels were clamped in place and then I took the measurement of the angle between them so that I he could calculate the miter. Each joint is a mitered connection that is glued into place, secured entirely by the ribs. In some places, there was the need to provide backing structure behind the joints to keep lines straight and secure, but most of the mitered edge connections were simply glued together. All the pieces then went to the finisher, which allowed the grain to truly pop! Installation day included the panels being fastened to the walls and fabricated by the contractor.
2. Cherry Street Coffeehouse
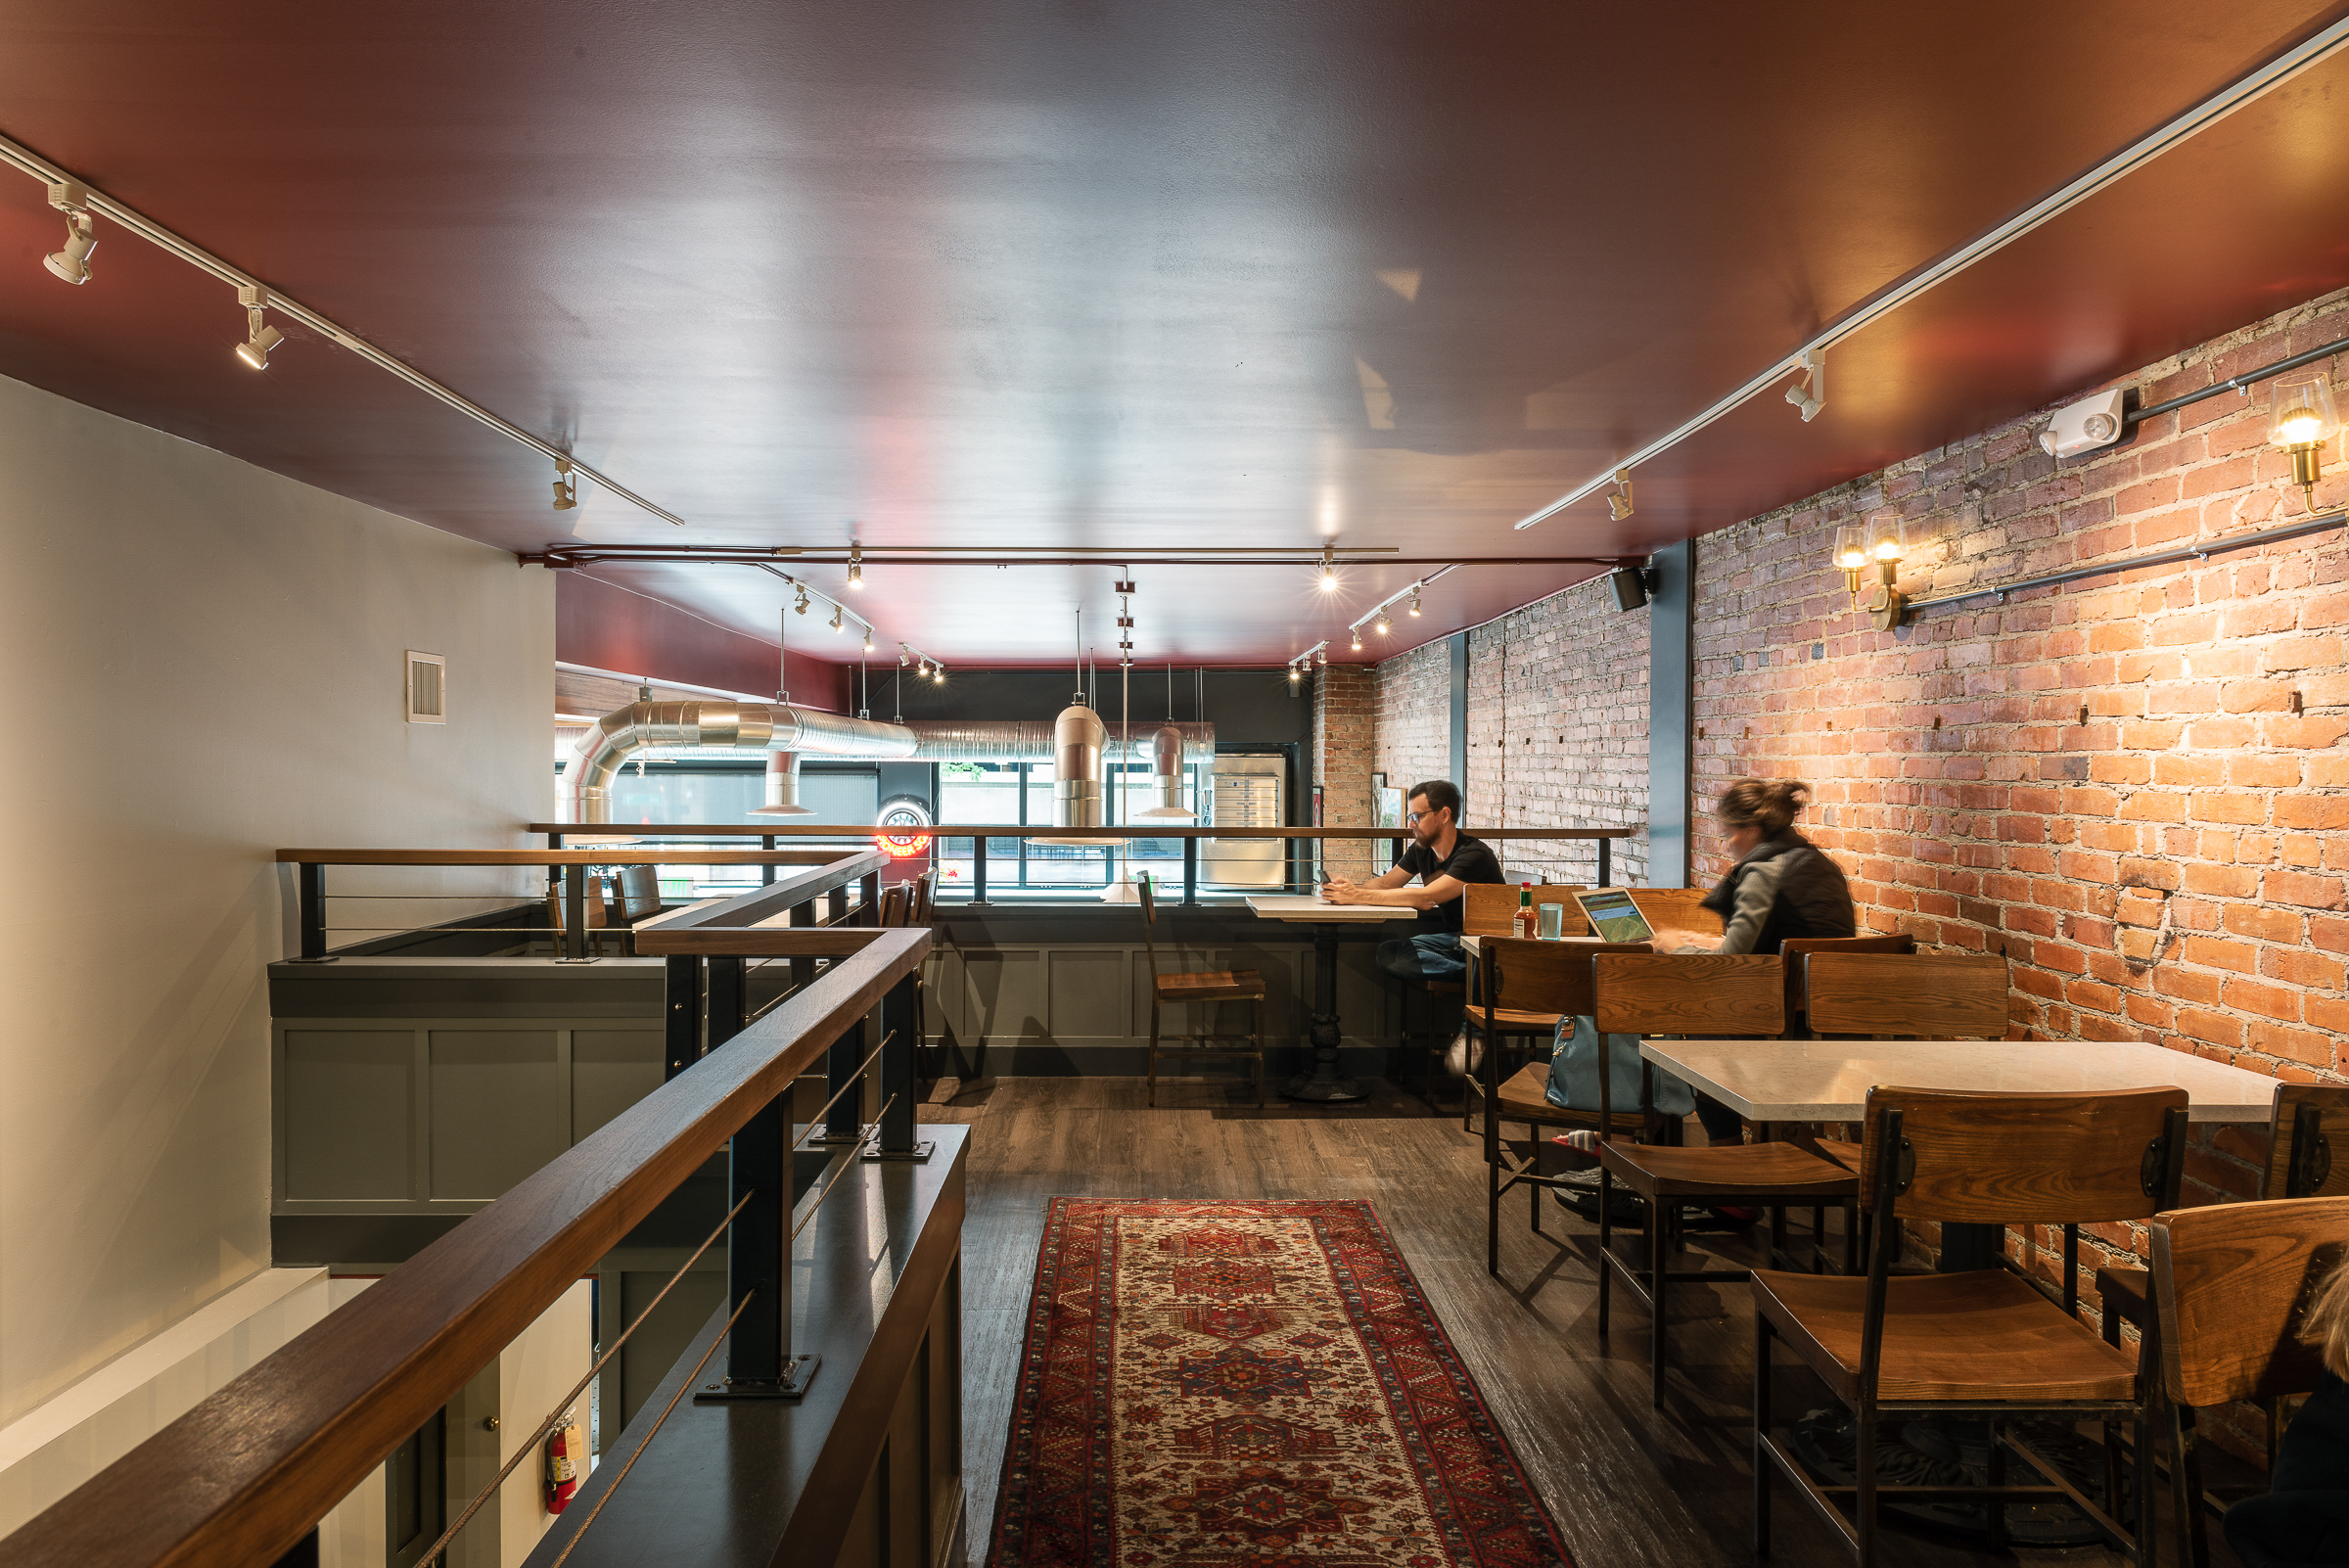
My second project was the first of several tabletop projects to help get some of our restaurant projects open. It often happens in construction that some portion of work gets overlooked in the budgeting phase. In the case of restaurants, it’s often tables, especially when they were designed to match other portions of the build-out. The reason is that furniture is widely considered to be client provided scope. The contractor can and will build tabletops, but if it’s not clear during pricing, it becomes a change-order and generally costs more in the end. In this case, I was able to step in and build them directly for the client and provide the wood to the contractor for other areas in the space, so everything matched!
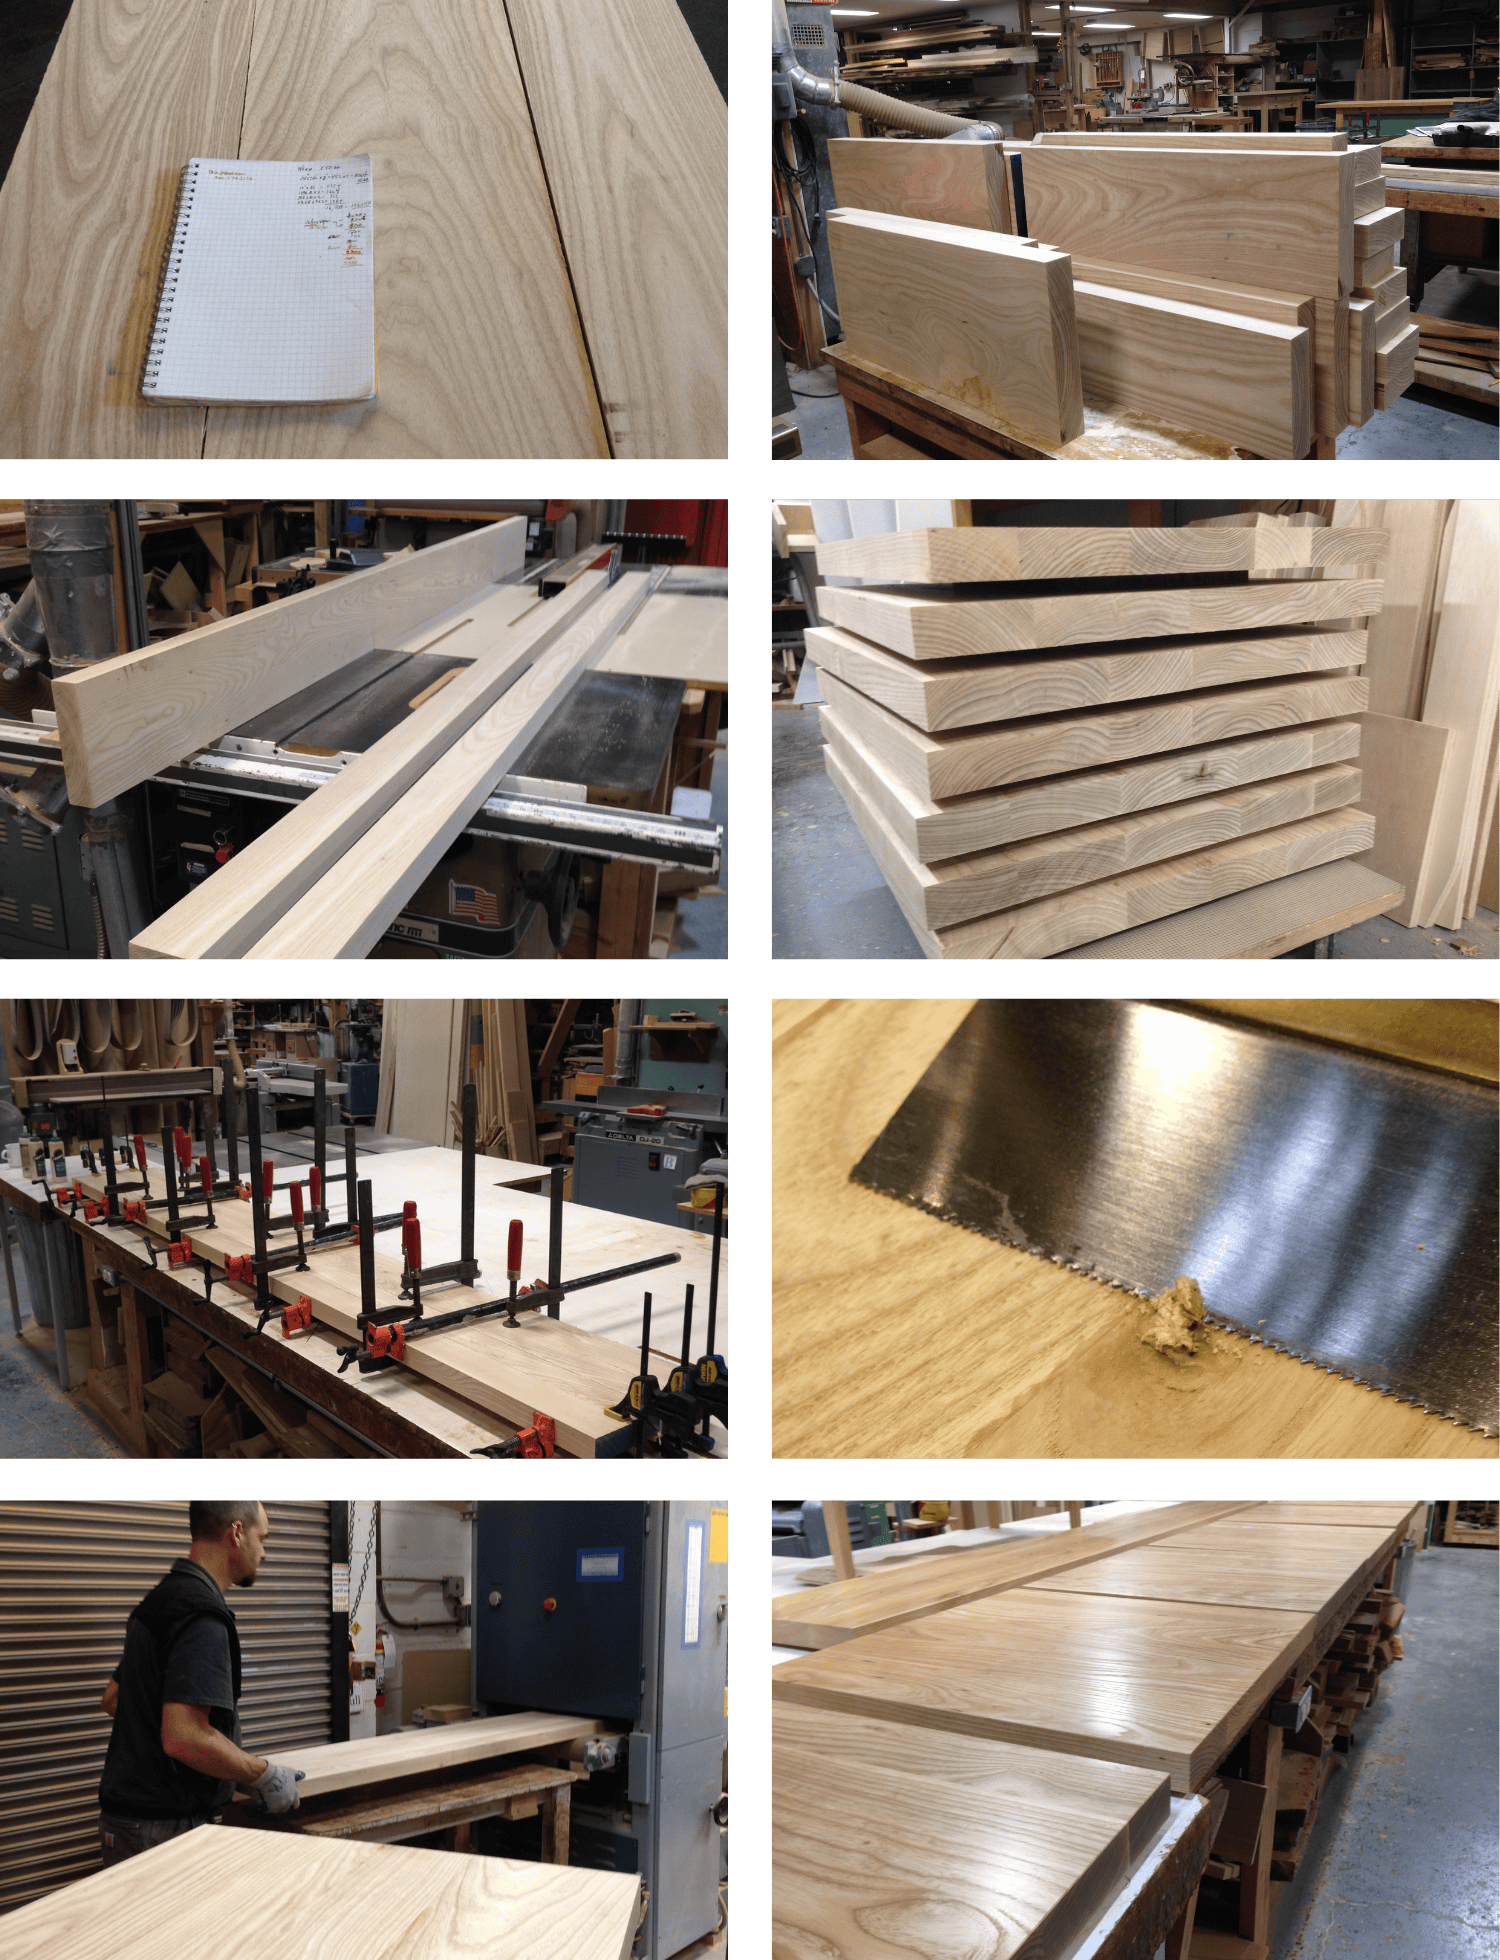
For this project the first step in the process was to rip the pieces down to a reasonable plank width and then glue the pieces together. The fourth image illustrates alternating the grain direction from one plank to the next. By doing this, you can better control how the whole panel will warp when the environment changes. No matter what you do, wood will move. If all the grain is going the same direction, the whole tabletop can (and often will) curl up. By flipping the grain, each board curves just a little, and if they all are curving in opposite directions, the overall form of the table will remain intact. Along with that, when you find knots you can use my method, which is to shape a little chunk of the same wood and glue it into the hole, cut it flush, and sand it smooth. Once finished with being flattened, trim the edges to length and finish sand by hand and dress the edges to remove any sharp points of contact. Then the grain is beautifully emphasized after the finish is applied.
3. Flatstick Pub (Pioneer Square) Golf Clubs and Tables
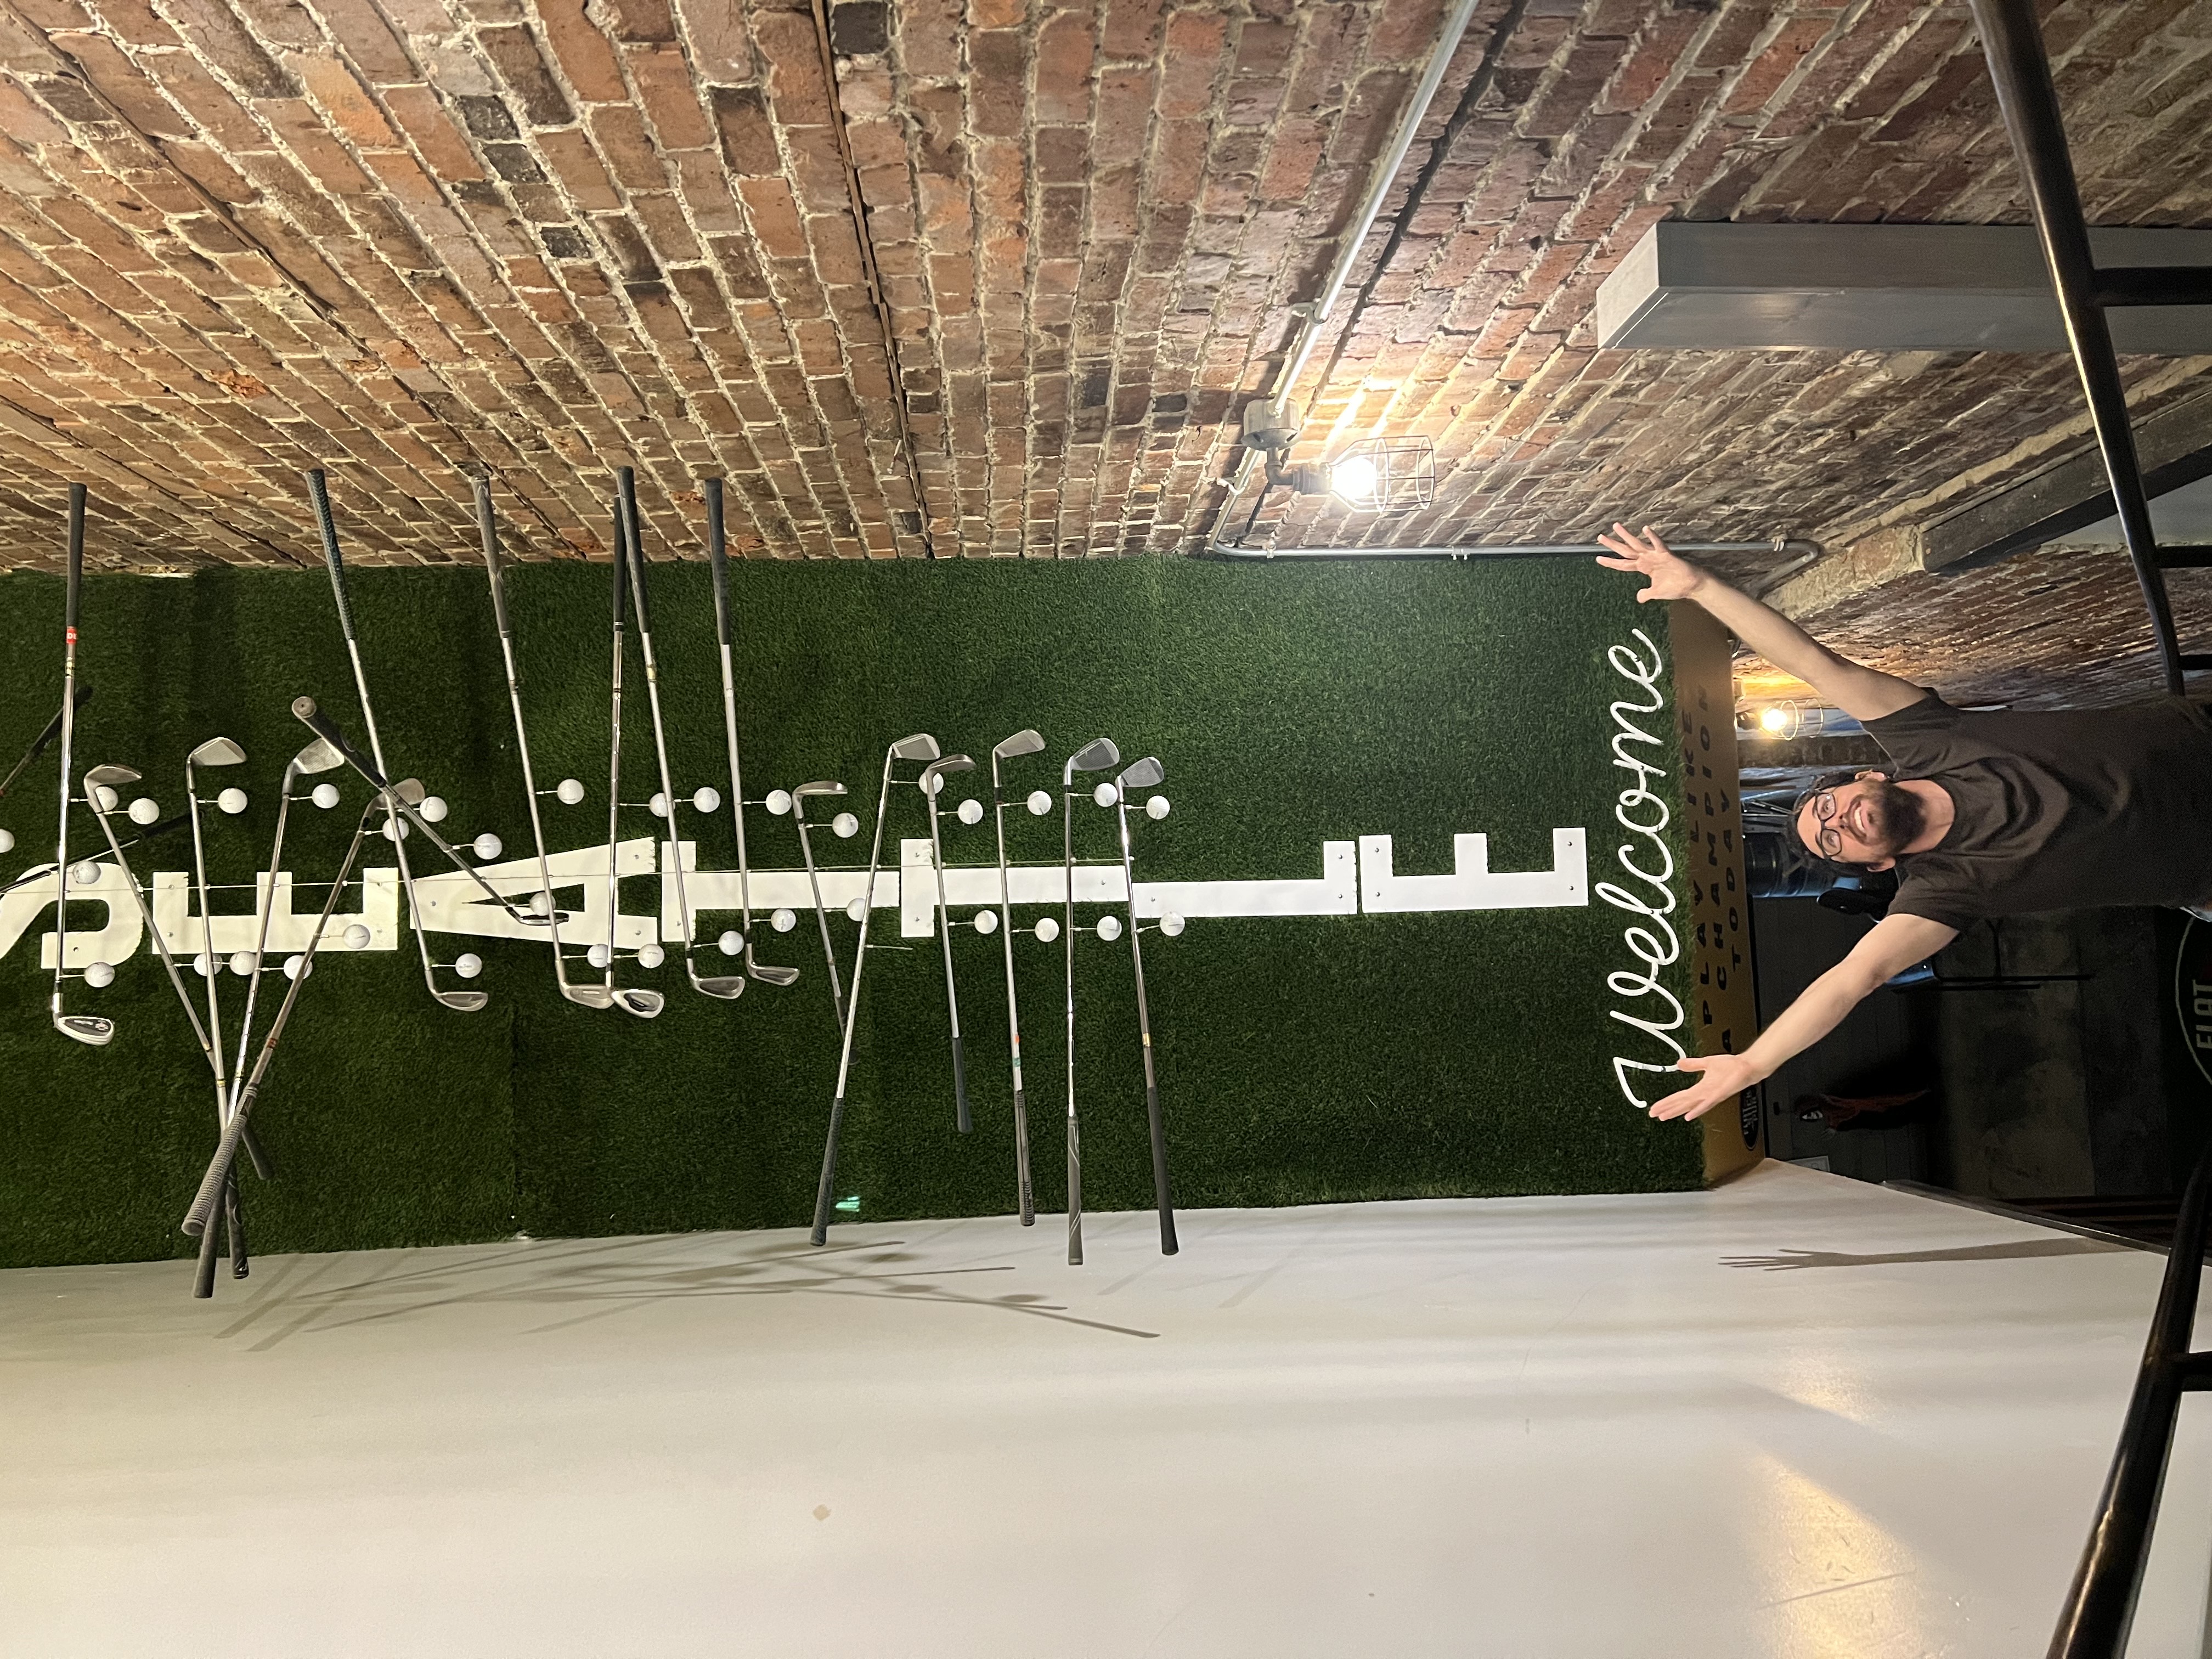
When we were designing Flatstick Pub in Pioneer Square, we came up with the idea to hang a mobile created with golf clubs from the ceiling. The golf area has very high ceilings, so we had ample space to design something complex. I was able to come up with a way to drill out old golf clubs, and thread them with wound cabling. This was out of my typical skill set, not being a woodworking project, but it was still fun for me to build something new for a client. The first sculpture was meant to be as wide as possible, and complex. Starting with one hanging point, the design spread out and split into many directions, all coordinated to dangle separately and not crash into each other. This one hangs over the center of the golf course. The second design hangs above the stairway at the entry from the street. Combined with golf balls, the clubs form a double helix, directing you down, and set the tone for a playful experience.
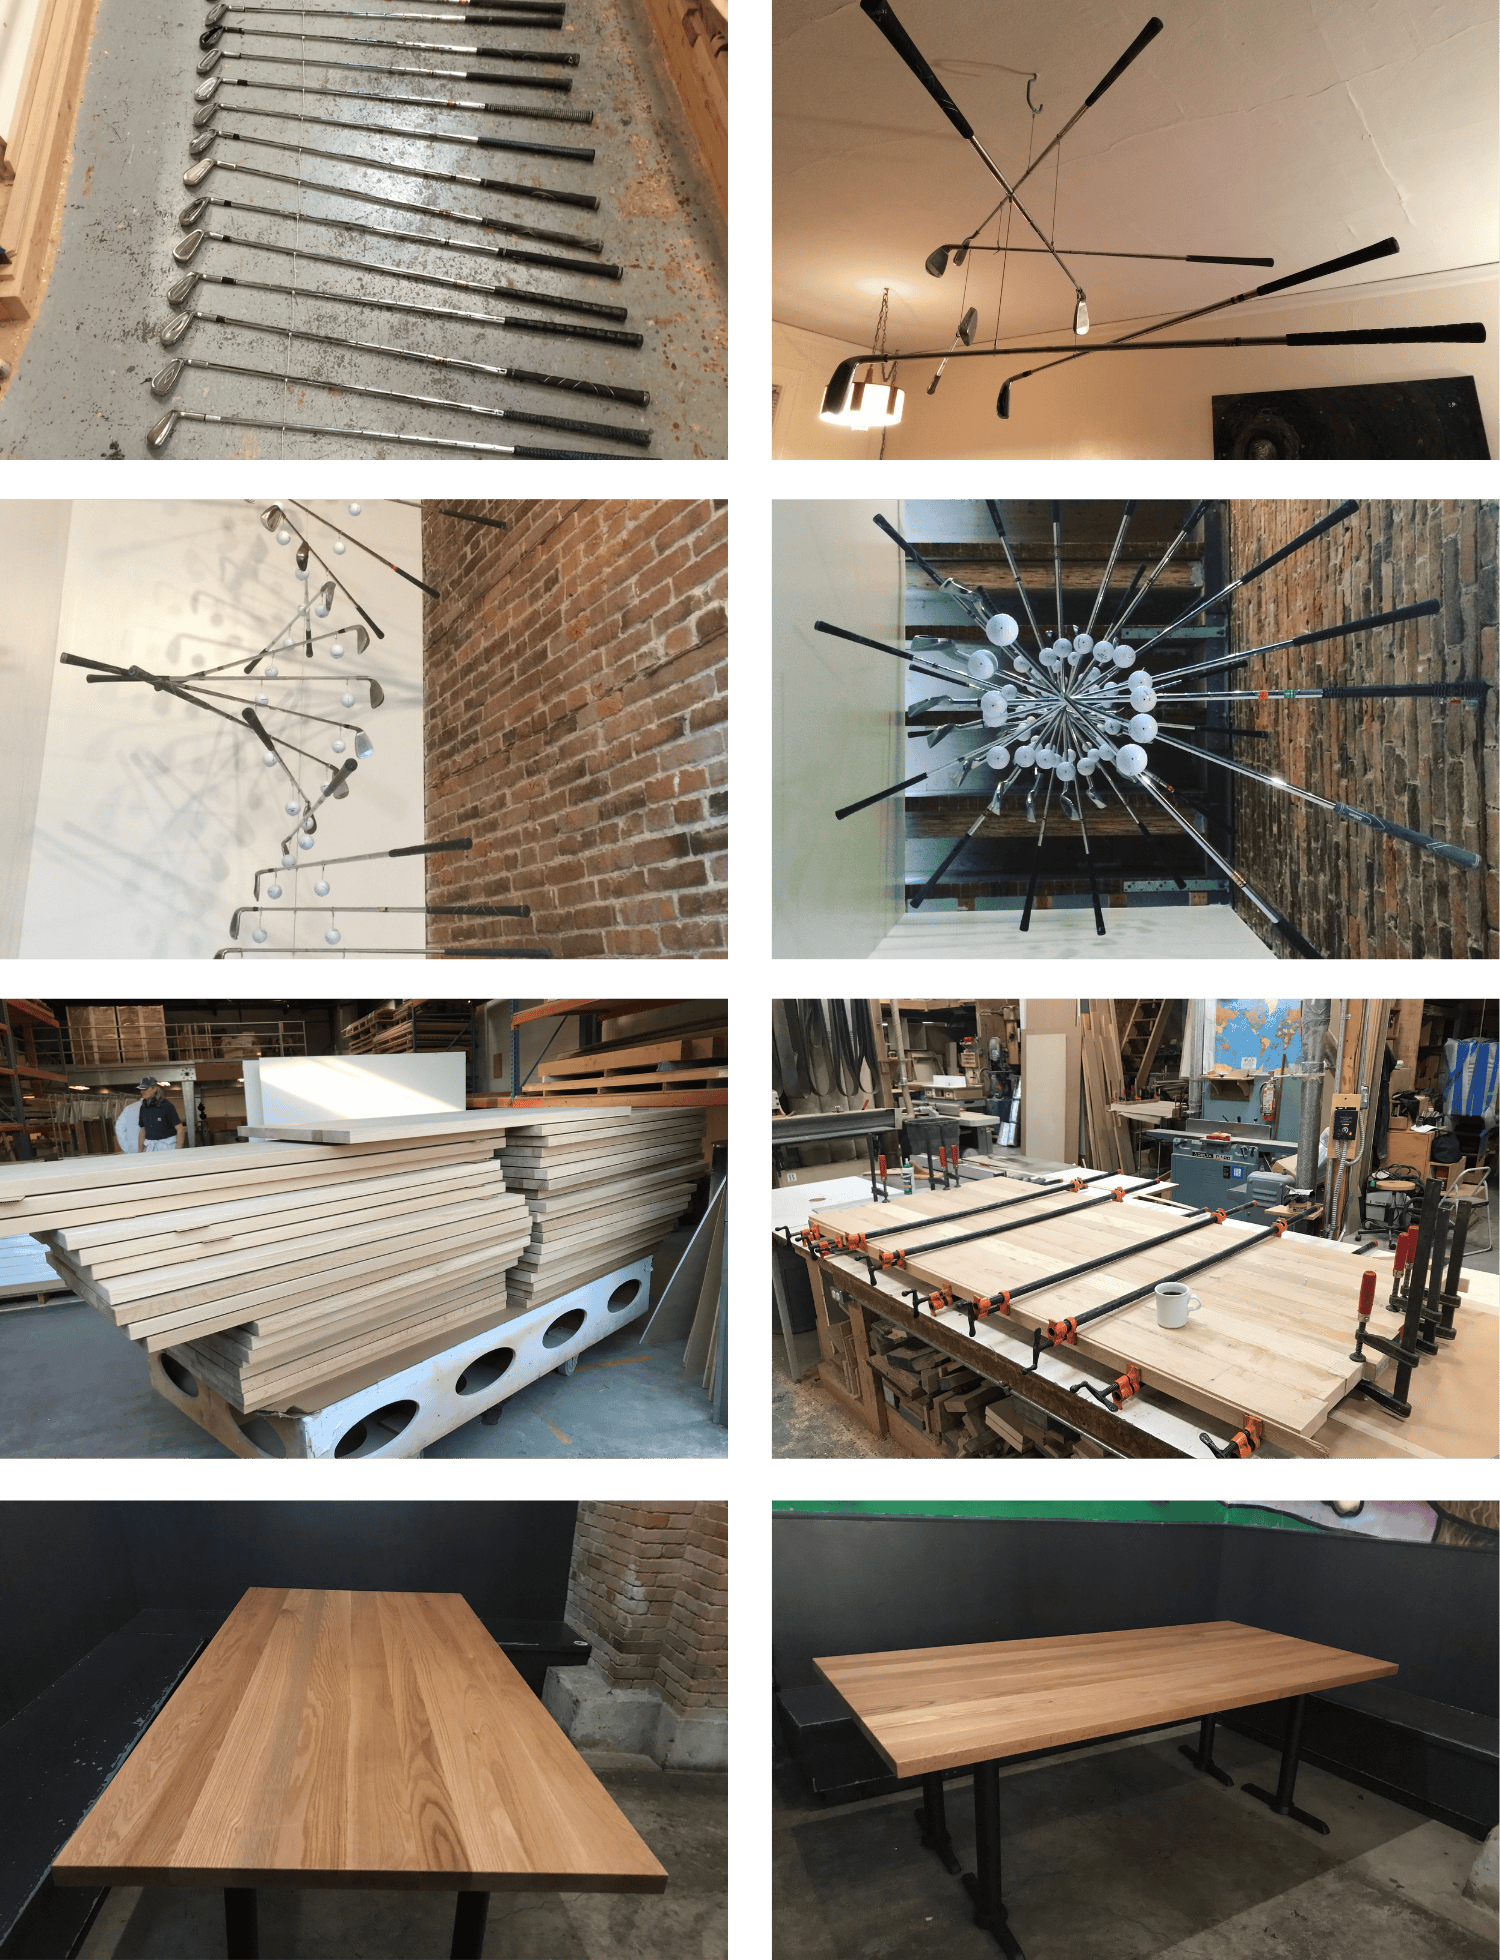
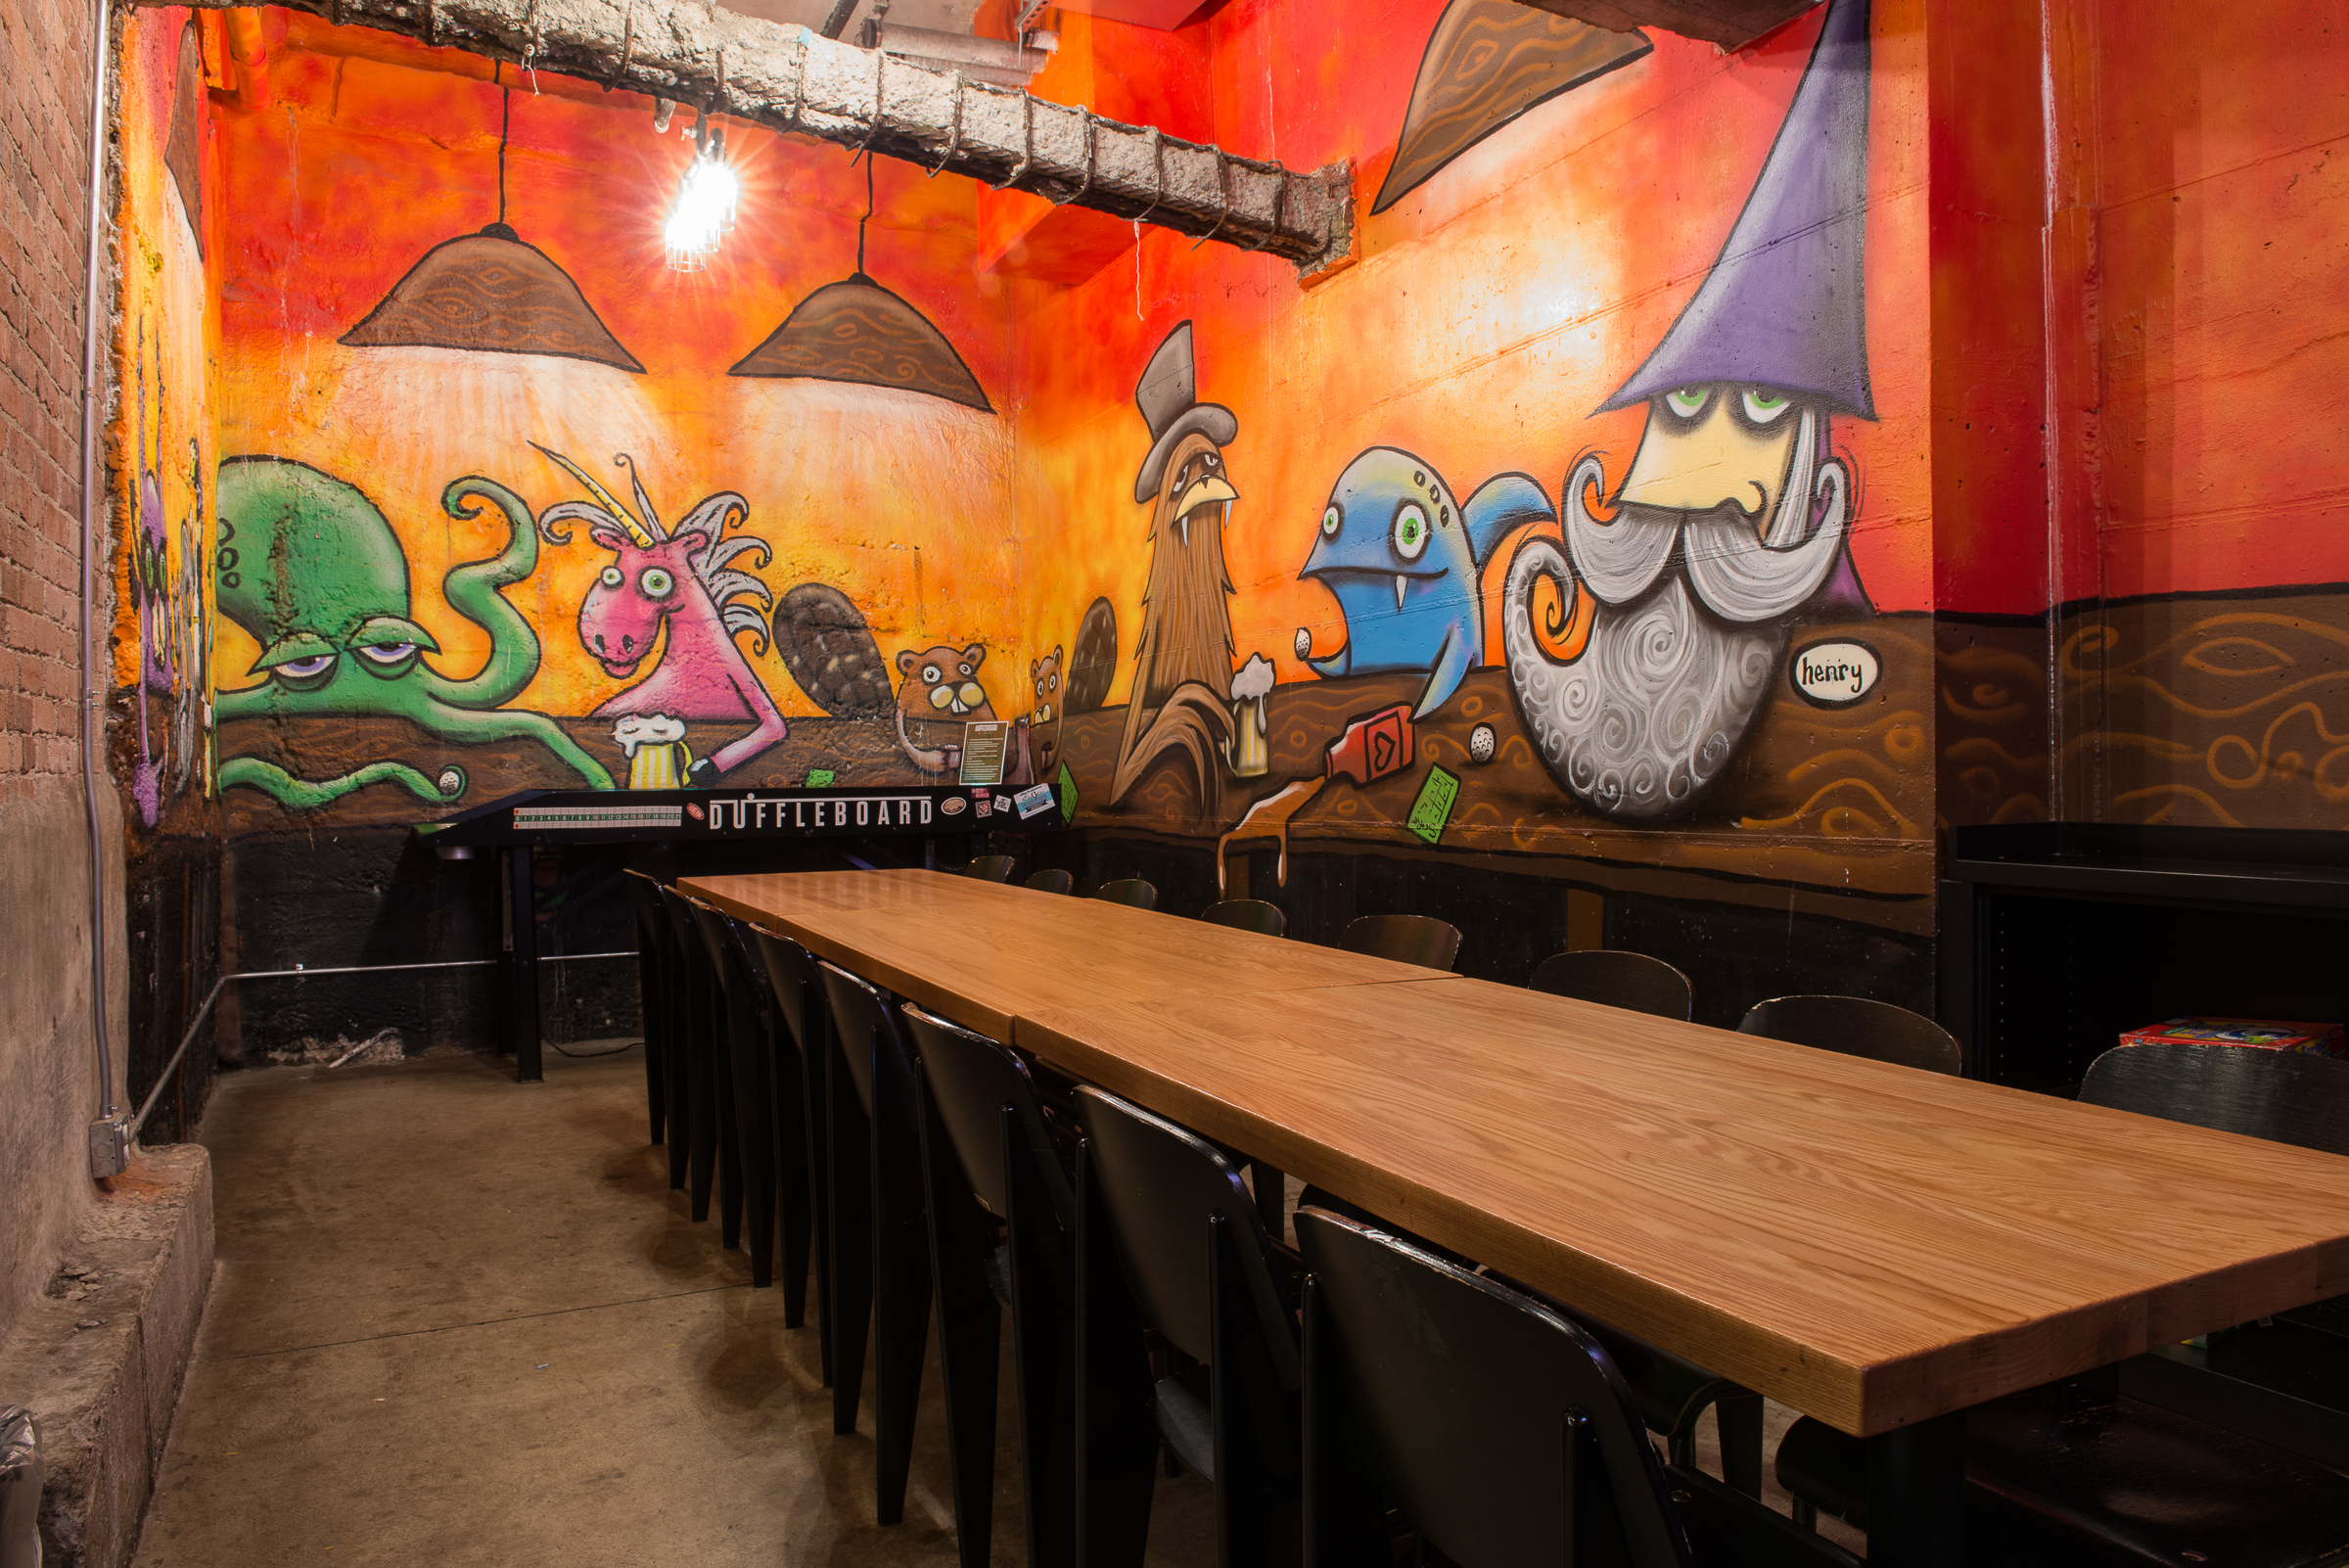
Flatstick later provided me with another opportunity to create tables at their new South Lake Union location, and later, adding more to the Pioneer Square location. This became a massive operation, for a one-person crew, and I had to get creative with my assembly line. These tables were all made with Oak. South Lake Union used White Oak, while Pioneer Square used Red Oak, as I was trying to match the existing tables. In all, I made approximately 120 pieces, some large, some small, with parts ranging from a large game table at Pioneer square, at about 42”x 96” down to small wall caps about 8” wide. Every part was branded to show which side was meant to be the bottom, and some were numbered to keep track of locations.
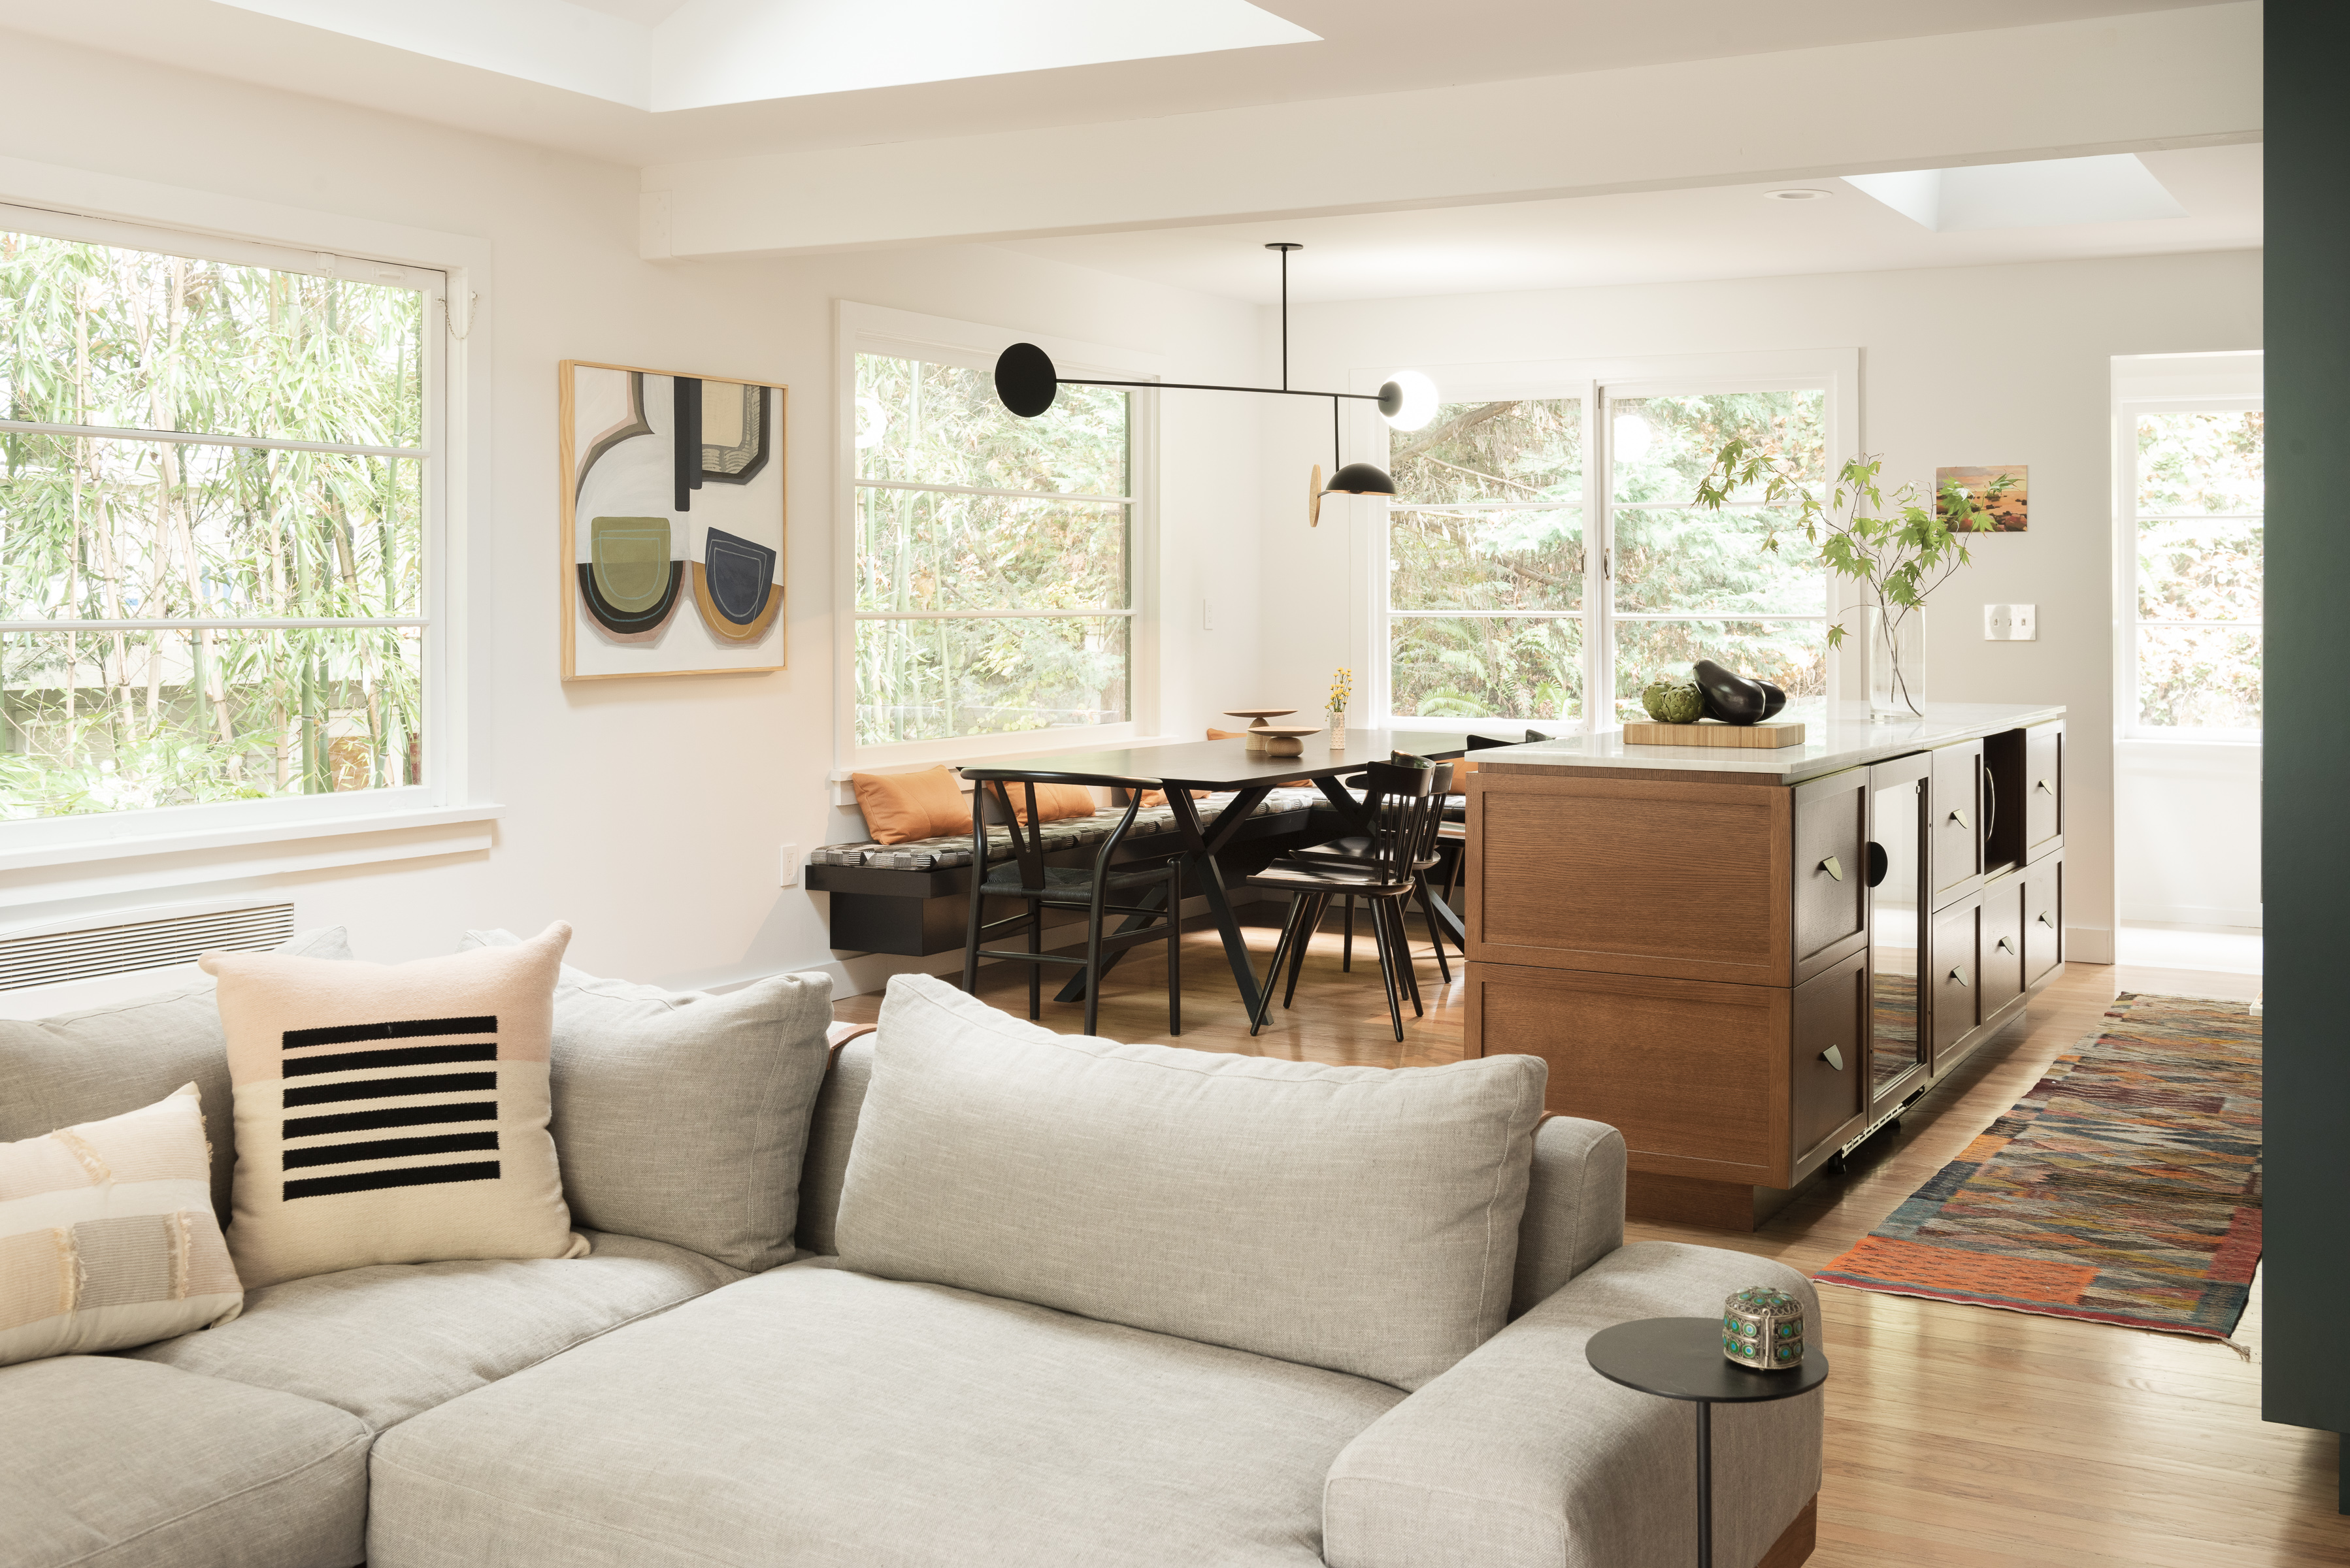
4.Leschi House
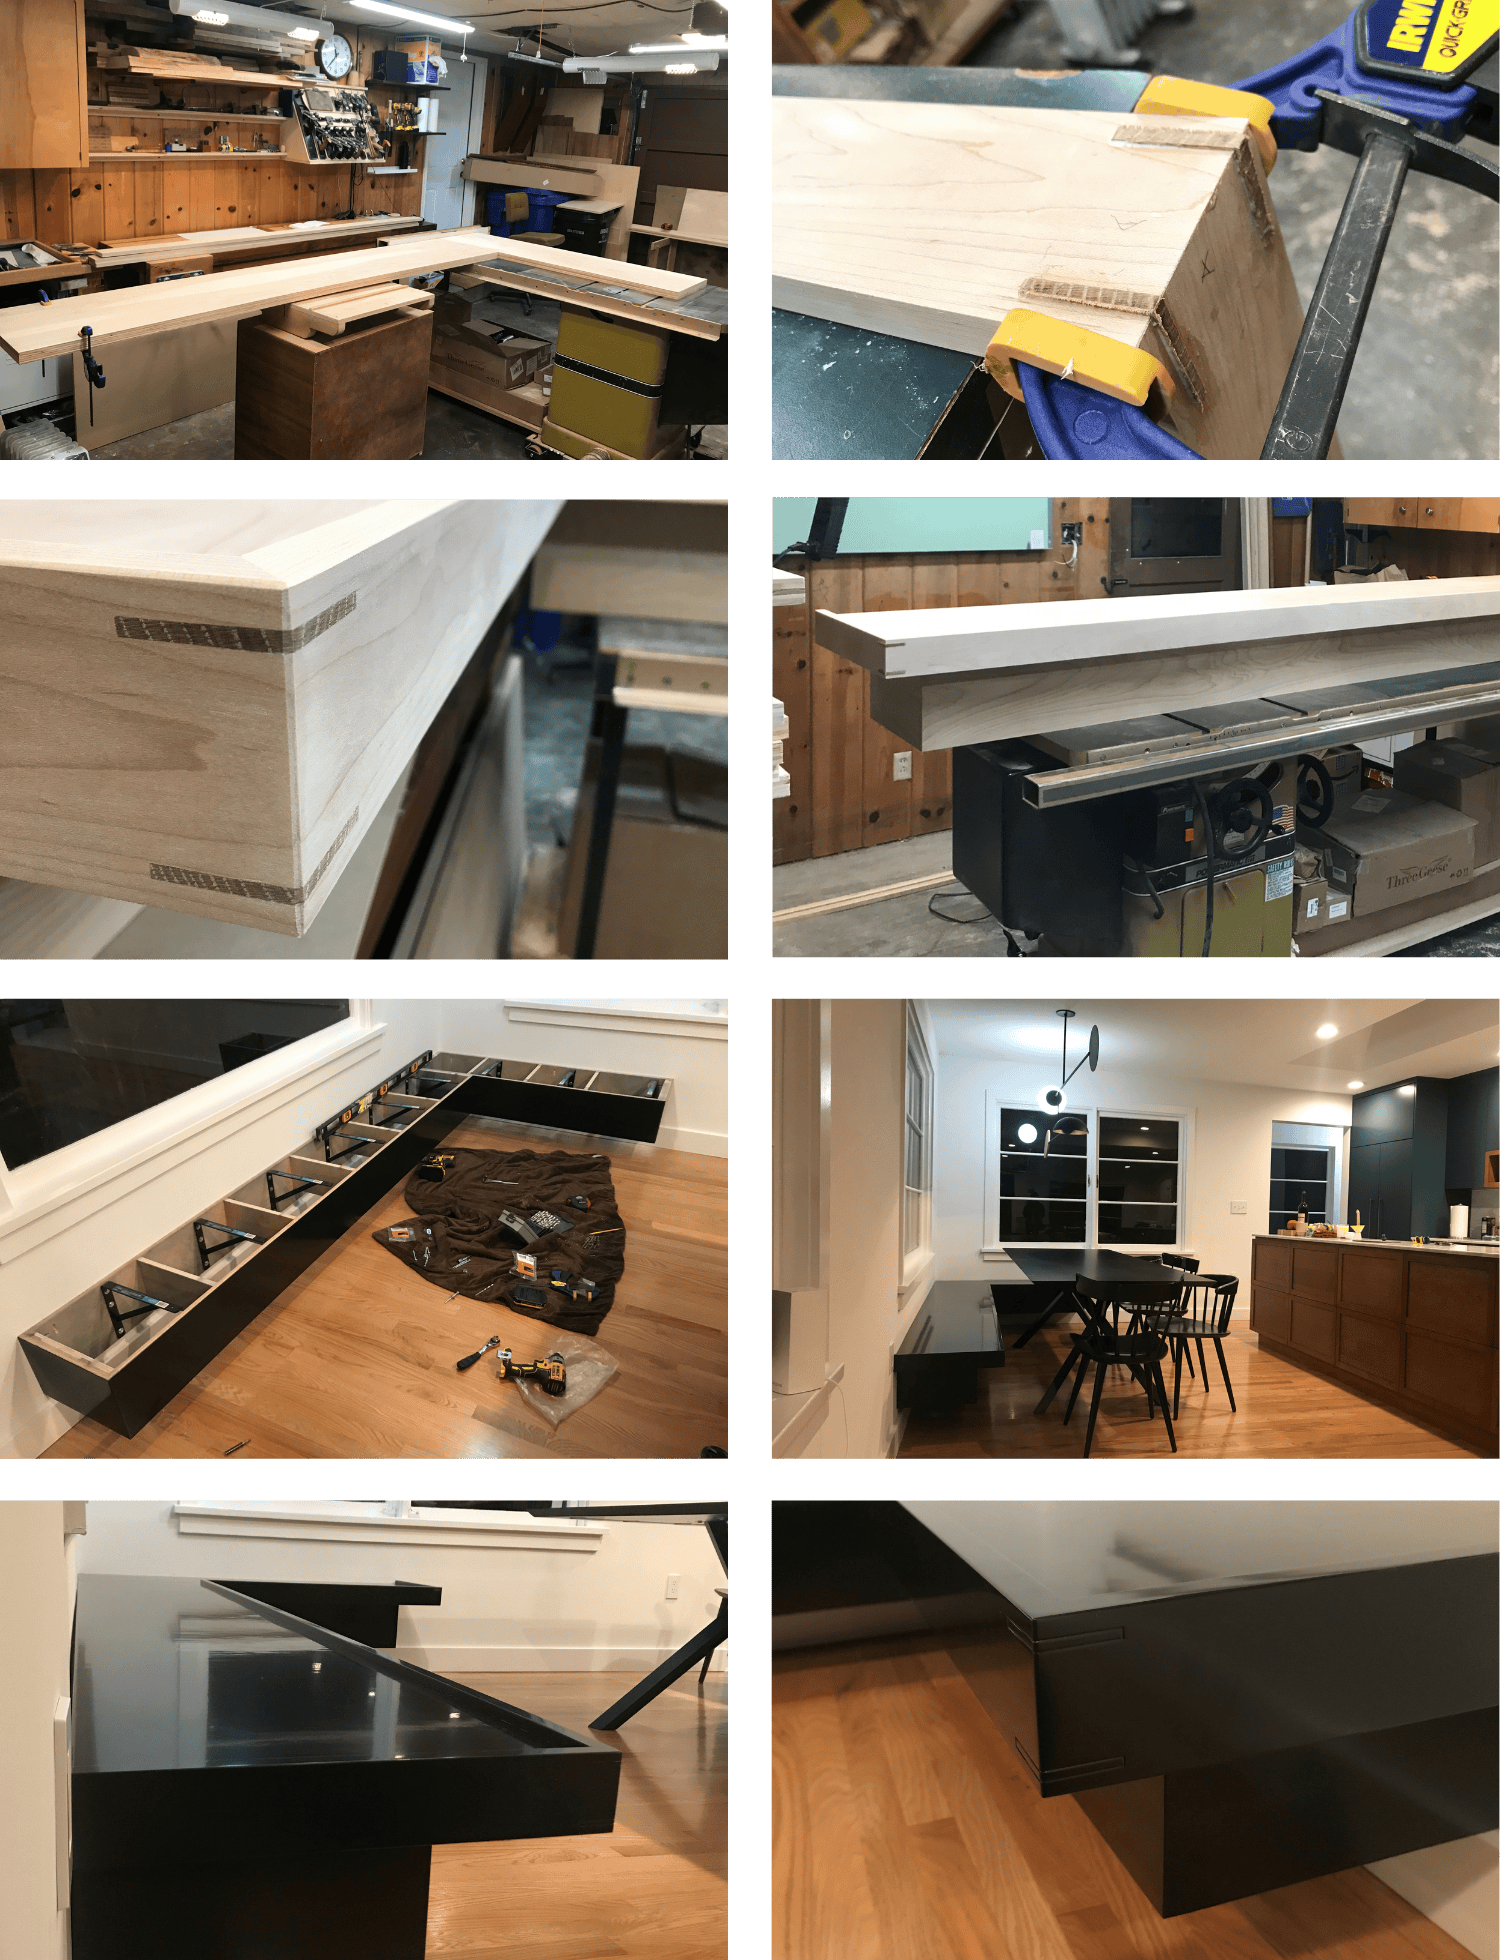
My first project in my new garage shop was to build a banquette for my client’s new kitchen. This was a relatively quick project, but it pushed the boundaries of my small one-car garage! The design was for an L-shaped bench that was suspended from the wall by brackets. Built mostly with birch plywood, and a solid maple apron. For a little fun detail, I chose to miter the corners of the maple, completed with splines to add stability, and chiseled out the edges of the spines, which show through the paint just enough – if you’re looking for them!
